
[1/2] Become your own Service Provider
/ 7 min read
Updated:Table of Contents
Everyone in the Privacy space talks about selfhosting because of the lovely corporations that like to look at everything we do just to show us an ad about we whispered about. Here I cover my personal process of getting my own services up and running in a country that isnt mentioned as often in the guides ive personally read.
This first part will cover acquiring hardware and setting it up for hosting.
Buying Hardware
There are a lot of options when it comes to purchasing the right hardware for your needs, with guides going into more detail than I ever care about.
The best option for beginners is to purchase a second hand mini pc, as they are not only cheap, and power efficent, but small enough to fit anything from a college dorm to a tiny apartment. Brand new hardware is ofcourse an option, but it is not as cost effective, and you will be paying a lot for something you may not end up using.
Online options
A lot of sites exist that will ship the hardware to your house, such as amazon and flipkart. A simple search for “mini pc” will yield a lot of results, but be careful as a lot of sellers put up false information to confuse you into buying something different. The most common issue i came across was the listing of wifi in devices from which they have obviously been scalped, and faulty hardware.
Other, non famous sites do exist for purchasing hardware in india, ones I have come across are:
- OLX But there again, are simply hardware that is either too big or businesses masquerading as individuals
- newjaisa seem legit with services like CoD and a promise of warranty by deploying local service centers.
Benifits of offline purchase
I had the privilege of being able to purchase hardware from the “tech market” of the country. Looking around will benifit you in terms of price, as the hardware is not only cheaper, but the persuasion skill to get better deals will come in handy. The average price will drop the further in you go.
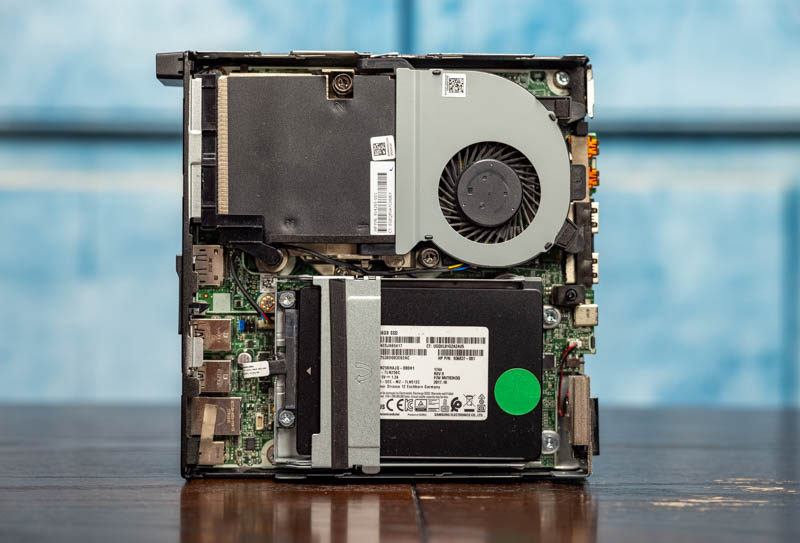 I myself did not go that far, and settled on an HP EliteDesk 800 G3 Mini, equipped with an i5-6500, 8GB of DDR4 RAM, and a 256GB SSD, for a total of 8K, and a free copy of windows 10. Ofcoure, depending on your needs, you may have to get better specs or hardware, but this has served me well with no issues so far.
A benifit of purchasing offline was the warranty, with a year on the CPU, 2 on the RAM and Motherboard, and 5 on the SSD. This, while a lot better than what you can get online, does mean youll have to come back to the store for any issues. A dongle was provided for wifi, as the built in was obviously scalped or taken out for other reasons.
Testing the hardware
Testing the hardware is indeed an important step, since the device is refurbished and the hardware attached may not be as ‘first hand’ as the boxes they take them out of may seem. My SSD was a faulty one and stopped reading after a few days. The replacement process was as simple as going back and telling them the issue, and they replaced it with a new one with no hassle.
A simple benchmarking tool like Phoronix Test Suite can be used to test the hardware, but I personally used Geekbench to test the CPU and RAM, and CrystalDiskMark for the SSD. These are not the best tools, but they are simple to use and give a good idea of what you actually got.
Setting it up
While you can keep the windows install and use that as a server, but windows sucks, and should be avoided for everything but gaming, (for atleast the next few years).
Installing Linux and its children
The best beginner option is to install debian, for its simplicity and LTS support. The installation process can be done with a USB and Rufus.
The installation process is simple, and the only thing to keep in mind is to select the correct drive for the install, as it will wipe everything on that drive.
Tutorials for installing can be found on youtube for the textually challenged. Make sure to select XFCE as it is the most lightweight and we wont be looking at the screen when hosting.
It is essential that you use wifi or ethernet for the installation process, as most installers want to download the latest packages and updates. The installation process will take a while, so be patient. One may lookup the method to skip those steps, but I dont care for it.
I went with endeavorOS, as it is what I use as my daily driver, and its package manager is a lot better. But if i had to do it again, debian would be my choice.
CasaOS
CasaOS is one of, if not the simplest way to get started with self hosting, as it uses a simple interface to manage all containers, puts everything in one place, and has a built in AppStore for the most popular services. With an option to add 3rd party store sources to expand the database of apps available. The process is well documented on their own site, and is easy to follow for debian.
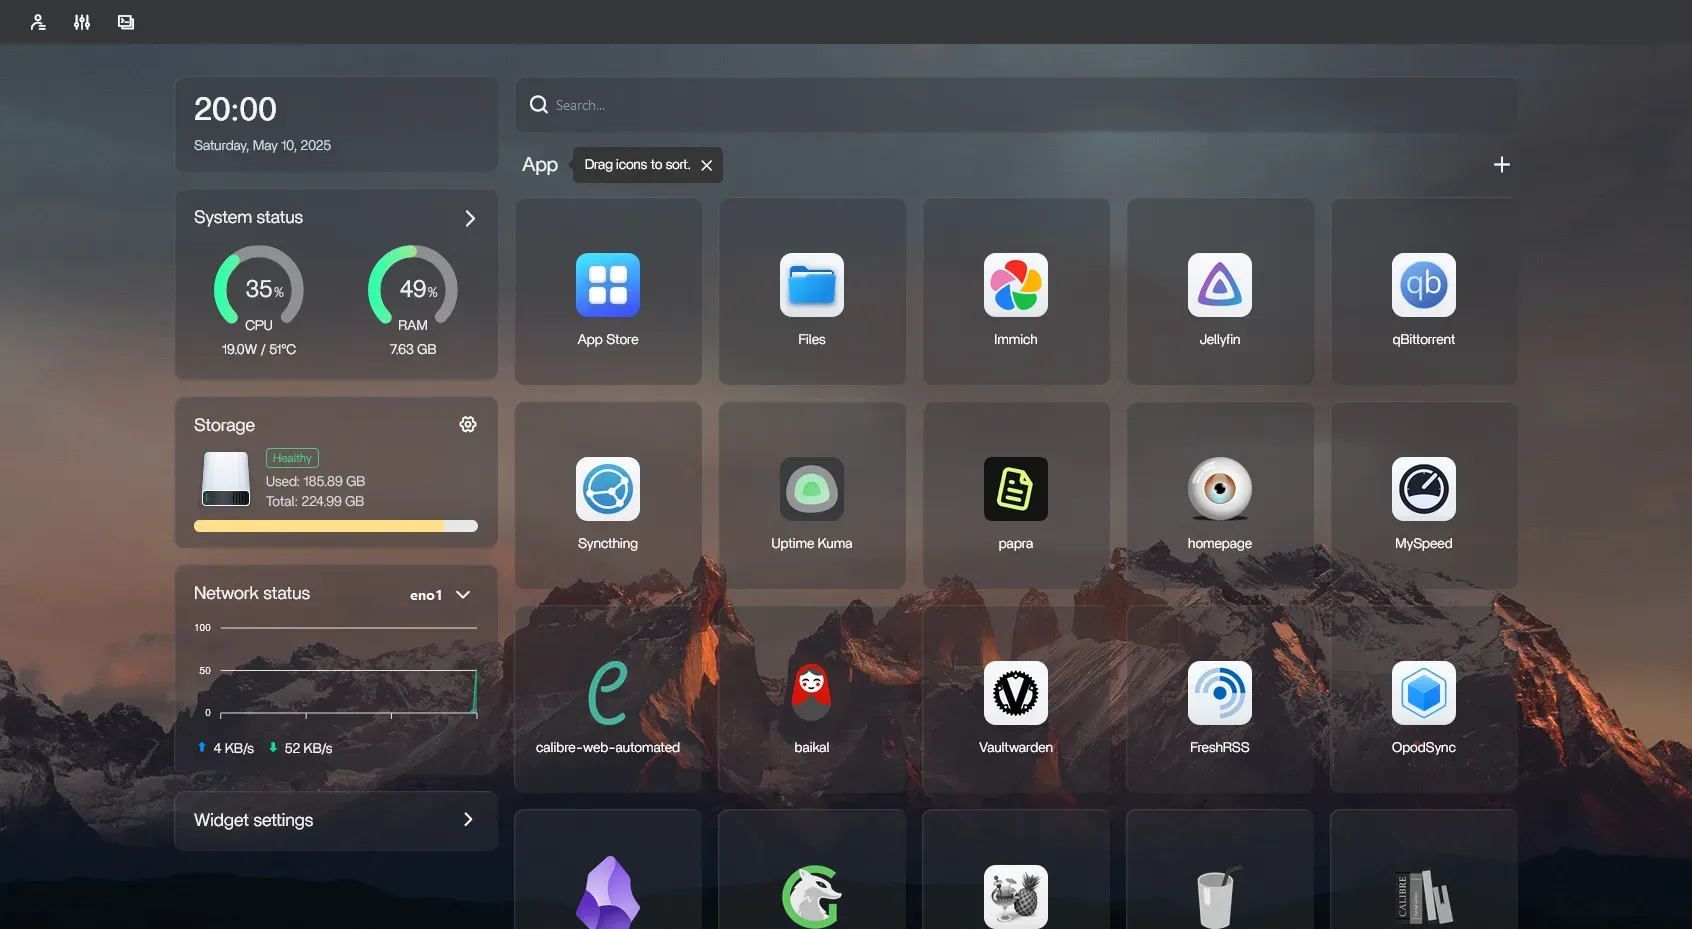
There are altenatives to casaOS, but are honestly not as straight forward for beginners and people who may want to move on to more complicated setups. Ive since moved on to using docker with cockpit and its extensions, and a homepage for visual style (DONT start with these as a beginner).
networking with tailscale
Tailscale is the best and only good option to connect to your server from anywhere, as it is a zero config VPN. Steps to install on linux is easy:
- Create an account on tailscale, use github for best results.
- From the admin dash, click Add Device > Linux Server, scroll down to generate the install script. Paste it into the terminal and run.
- After installation, check the connection on the admin dash, and change the key expiry to never, else it will deauthenticate after a few months.
 4. Make it start on boot, with the commands
sudo systemctl enable tailscaledsudo systemctl start tailscaledWake on LAN and AMT
These, while not necessary, offer a great quality of life improvement when it comes to self hosting.
WOL
Wake on LAN is a feature that allows you to turn on your computer from anywhere, as long as it is connected to the internet. This is useful for self hosting, as you can turn on your server from anywhere on the local network (for added privacy), and it will be ready to go when you need it. To enable WOL, you need to go into the BIOS and enable it. The option is usually under the power management section, and is called “Wake on LAN” or “Power on by PCI/PCIe device”.
In linux, according to the Arch wiki, you can enable it with the command sudo ethtool -s <interface> wol g, where <interface> is the name of your network interface (usually eth0 or enp0s3). This will be temporary, but there are steps on the same page to make it permanent/persistent.
AMT
AMT is a feature that allows you to manage your computer remotely, even if it is turned off! Scary stuff if you think about it. I personally use it for power cycling and remote access to the BIOS (screen sharing requires a display output).
To enable AMT, you need to go into the BIOS and enable it. The option is usually under the power management section, and is called “Intel AMT” or “Intel Management Engine”.
Steps to do that for HP can be found through James Vaughn’s blog. Learn your device’s IP, and never forget your password!
Apps
- SimpleWOL personal favorite for WakeOnLan
- Termius for SSH and WOL, freemium
- Mesh Commander for AMT with remote capabilities.